

How To Change Extension Name On Polycom Phone
Quick Links
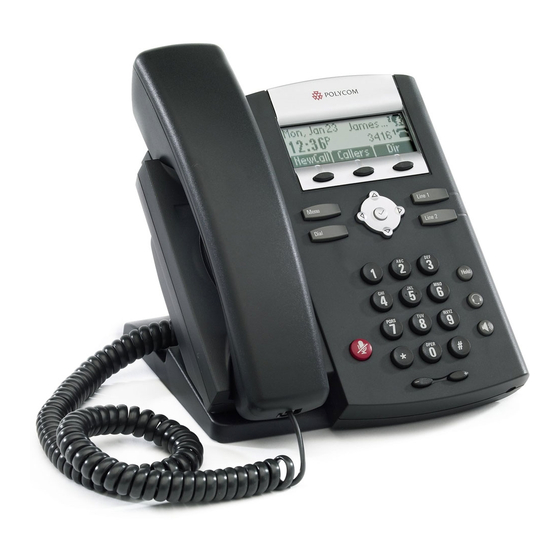
Polycom IP331 Phone
Owner'southward Manual V.iii
1

Related Manuals for Polycom IP331
Summary of Contents for Polycom IP331
- Page 1 Polycom IP331 Phone Owner'due south Manual V.iii...
-
Page 2: Tabular array Of Contents
USING YOUR HOSTED PBX Phone Arrangement ..................26 Arrangement Description ..........................26 Getting Started ............................26 Polycom 2-Line Desk-bound Telephone ........................26 Desk-bound Phone– Basic Call Features ......................29 Answering Calls ............................29 Answering When Not in Another Call ...................... 29 To answer a call using the handset ...................... - Page 3 Rejecting Calls............................30 Diverting Calls ............................31 Catastrophe a Phone call ............................32 Placing a call ............................32 To place a call using the handset: ......................32 To place a call using Hands-Free Speakerphone mode: ................32 To place a call using the headset ......................33 To place a telephone call using the Punch key: ......................
- Page 4 To activate Headset Memory Way: ....................... 57 Electronic Hookswitch..........................57 To select a headset that supports electronic hookswitch: ............... 56 Band Type ..............................56 Linguistic communication Support............................ 57 To alter the language: ......................... 57 Directory Search ............................57 To change the directory search parameter: .................... 57 Muting the Microphone ...........................
-
Page five: Introduction
Introduction Congratulations on purchasing the Hosted PBX phone system and service. You will now exist able to share your phone connectedness betwixt fixed & wireless handsets and across multiple locations using the latest in 'Voice over IP' services. This User Guide will testify you lot how to setup and use your new Hosted PBX phone organisation and service. - Page 6 openings must non exist blocked or covered. This product should never exist placed near or over a radiator or rut register. This production should not be placed in a built-in installation unless proper ventilation is provided. • This product should be operated only from the blazon of ability source indicated in the manual.
-
Page 7: Fcc Information
FCC Information This equipment complies with Part 68 of the FCC rules and the requirements adopted by ACTA. A FCC compliant phone string and modular plug is provided with this equipment. This equipment is designed to be continued to the telephone network or bounds wiring using a compatible modular jack that is Office 68 compliant. -
Page 8: Systems
Systems Facility Interface Codes (FIC), Service Order Codes (SOC), USOC Jack Codes and Ringer Equivalence Numbers (REN) are shown in the table beneath for each port where applicable: Port USOC Line 1 02LS2 9.0Y RJ11C 0.1B Line two 02LS2 ix.0Y RJ11C 0.1B Line... -
Page 9: Rf Radiations Exposure
generates uses and can radiate radio frequency free energy and, if non installed and used in accordance with the instructions, may crusade harmful interference to radio communications. However, there is no guarantee that interference will not occur in a detail installation. If this equipment does crusade harmful interference to radio or television reception, which tin exist determined past turning the equipment off and on, the user is encouraged to try to correct the interference by one or... - Page ten This equipment cannot exist used on the phone companyprovided money service. Connexion to Party Line Service is subject to State Tariffs. If this equipment causes harm to the phone network, the telephone company will notify yous in advance that temporary discontinuance of service may be required.
-
Folio 11: Boosted Fcc Data
Boosted FCC Information 1. If this equipment causes harm to the phone network, the telephone visitor will notify y'all in advance that temporary discontinuance of service may be required. But if advance detect isn't practical, the telephone visitor will notify the customer equally presently as possible. - Folio 12 Important Battery Data This product uses rechargeable Lithium-ion batteries 3.7V, 650mAh. Only use batteries that come with the handset or dedicated spare batteries marked with "Battery Pack 3.7V 650mAh Li-ion". Practice not utilize any other type, since this may present a risk of leakage, fire, explosion or other chancy situation.
- Page 13 residential installation. This equipment generates uses and can radiate radio frequency energy and, if not installed and used in accord with the instructions, may cause harmful interference to radio communications. Notwithstanding, there is no guarantee that interference will not occur in a particular installation.
- Page fourteen This handset meets the FCC standard for Hearing Assistance Compatibility. FCC Identifier: ELIRTX3080 Proper name of Grantee: RTX America Inc. Date Granted: nine/23/05 Grant Number: R0508295-iv Equipment Grade: Role 15 Unlicensed PCS portable Tx held to ear Notes: RTX3080.32 FCC Rule Parts: Frequency Range: 1921.54-1928.45MHz UL Identifier:...
-
Page 15: Using This Certificate
Using this Certificate Notational conventions Acronyms are divers the first fourth dimension they appear in the text. The term LAN refers to a group of Ethernet-continued computers at one site. Typographical conventions Italic text is used for items you select from menus and driblet-down lists and the names of displayed web pages. -
Page 16: Basic Requirements
Bones Requirements The Hosted PBX telephone system is designed to utilise your existing broadband data connection as well as the existing data wiring in your office. Where y'all don't accept data wiring, you may use the optional Wireless Transmitter and Wireless Adapters to connect Desk-bound Phones wirelessly. -
Folio 17: Getting To Know Your Hosted Pbx System
Getting to know your Hosted PBX system Before you Brainstorm Your Installation The Hosted PBX phone organization is designed to utilize your existing broadband data connectedness likewise equally the existing information wiring in your office. Where you don't have data wiring, you lot may use the optional Wireless Transmitter and Wireless Adapters to connect Desk Phones wirelessly. - Page 18 Cordless Phones: This diagram depicts the setup options for Cordless Phones. Cordless phones can be used in conjunction with Desk Phones or they can be installed stand up-lone. Fax Adapter: This diagram depicts the setup options for the Fax Adapter. The Fax Adapter allows yous to use your existing fax car with the Hosted PBX service.
-
Folio xix: Assigning Extension Numbers And Phone Numbers To Phones
Setup Options that are not supported The post-obit setup options ARE NOT supported: 1. Connecting a phone through multiple routers 2. Connecting i phone to another 3. Connecting a phone wirelessly and then connecting a PC Assigning Extension Numbers and Telephone Numbers to Phones Each phone is assigned an extension and a phone number. -
Page 20: Installing Your Hosted Pbx Telephone Organization
email from usa with the phone numbers and extensions associated with each enhanced services such as an Automobile Attendant or WebFax. You may also log into your Control Panel at https://cp.serverdata.net to view a list of your phone numbers and extensions. -
Folio 21: Choice i: Connect Desk Phones Using Your Existing Data Network
Pick one: Connect Desk Phones using your existing data network Use the included phone cord connect 1 terminate into the port on the back of the phone labeled and connect the other end into any data port on your network (router, switch or wall jack). To your router or wall jack Option 2: Connect Desk phones using your existing data network and then connect the phones to your computer... -
Folio 22: Note
The wireless adaptor has its own power supply. Plug the telephone'south power string into the curt "power in" cord on the wireless adapter and so into the wall outlet. Then, ane. Plug the included LAN cable into the Wireless Adapter 2. -
Folio 23: Setting Up The Base of operations
Setting upwardly the Base Before using the Desk Phone, you lot must attach the base. The base of operations has two pins: one that retracts and one that is stationary. These pins attach the base to the telephone. Attaching the Base of operations Adhere the phone base to the phone in one of the post-obit ways: •... -
Page 24: To Adhere The Base As A Wall Mount
3. Snap them together to lock the bracket to the phone. To adhere the base of operations equally a wall mount: 1. Place all cords in the recessed surface area below the modular jacks. 2. On the dorsum of the telephone, remove the key located backside the hook switch and reposition information technology then that the finish tab (at a 450 angle) is facing up... -
Page 25: Activating The Service
3. Using wall anchors (not included), fasten the base stand with the mounting tab facing upwards. four. Align the base stand tabs with their respective insertion points on the telephone, and and then snap the phone into place (equally shown). Activating the Service Earlier you can make or receive calls, yous demand to activate your phone line(southward). -
Page 26: Using Your Hosted Pbx Phone Organization
Hosted PBX phone system and its features. It also explains how to program arrangement settings for your Desk Phones. Polycom 2-Line Desk Phone Introduction to your Polycom ii-Line Desk Phone The 2- Line Desk Phone is a fully-featured business phone with a host of useful features designed to make your business organization communications more than efficient. - Folio 27 Part Name Description of office Bulletin Waiting This volition alert you to voice and text (instant) Indicator messages. Line Icons Use these keys to activate upward to lines that can be assigned to your phone. The associated icons represent: -Registered line -Registered shared line -Unregistered line -Voicemail...
- Folio 28 Line Indicators The LED'due south indicate the following: - Solid light-green-An active call is in progress. - Fast flashing green-In that location is an Incoming (ringing) call. -Flashing red-The call is on hold. Line Keys Activate upwards to two lines that can be assigned to your phone.
-
Page 29: Desk Phone- Basic Call Features
Navigation keys Apply arrow keys to scroll through the displayed data. Apply (the Select key) to select a field of displayed information or enter edit mode for some settings. Speaker For ringer and hands-gratuitous sound output. Hookswitch Graphic Brandish Shows information about calls, messages, soft keys, fourth dimension, appointment, and other relevant data. -
Page 30: Handling Multiple Calls
Press to answer the call through an optionally connected headset. If Headset Memory Way is activated, printing or the Reply soft key. Handling Multiple Calls You can brand or receive ii simultaneous phone calls on your Desk Telephone. These can be two different phone calls or the calls can be joined in a conference. -
Folio 31: Diverting Calls
1. Press the Dir soft key. ii. Use to scroll through the list to find the contact. 3. Press to select the entry. four. Press the Edit soft primal. 5. Press repeatedly until the Machine Turn down field is displayed. 6. Press , and so to change between Disabled and Enabled. -
Page 32: Ending A Call
10. Press , and so to alter between Disabled and Enabled. 11. Printing the Ok or Cancel soft keys to accept or cancel changes. 12. Press repeatedly to return to the idle display. Catastrophe a Call To terminate a call: Do ane of the following steps: Press the EndCall soft key. -
Page 33: To Place A Call Using The Headset
Do 1 of the following steps: 1. With the handset on-claw, press , or the NewCall soft key to obtain dial tone. 2. Dial the desired number using the dial pad. With the handset on-claw, dial the desired number using the dialpad. -
Folio 34: Managing Call Lists
You do Non demand to dial 9 to make a phone Note call. Managing Phone call Lists A list of up to four current calls is maintained. Yous tin can scroll through this list using the . Calls are ordered using the following priorities: agile, alerting, so held. Calls with the same priorities are ordered oldest start. -
Page 35: Phone call Hold
Press the Info soft key to see the phone call information. The proper name is displayed. Admission the other information past using the Upwardly and Downwardly arrow keys. Annotation • To delete the telephone call from list: 1. Press the Delete soft key. 2. - Page 36 • Consultative transfer - The party to whom yous want to transfer the phone call answers their phone before you transfer the call or hang up. You can consult with them before completing the transfer. • Blind transfer - The call is automatically transferred later on yous punch the number of the political party to whom you want to transfer the call.
-
Folio 37: Note
to access the contact, and so press e) Press to admission the Placed Call list, employ to admission the contact, and so press At this point, the call is connected to the number to which you are transferring them. Transferring an external telephone call to an external number ties up two lines. -
Page 38: Call Park
Phone call Park To Park a telephone call Parking a call is very similar to putting a call on concord. The key difference is, when you put a call on hold you tin can simply call up the held telephone call from the phone that put the call on concord. With Phone call Park, you lot can put a call on hold and choice it upwards from ANY telephone inside the aforementioned Call Park Group. -
Page 39: Forwarding Incoming Calls
4. Make your announcement which will exist heard on all phones (except phones set to DND or phones in apply). 5. Hang up the phone when finished Answering a Folio 1. Either selection upward the handset or uses the speaker phone 2. -
Page xl: To Disable Telephone call Forwarding
To disable call forwarding: one. Press and select Features > Forward. 2. (Optional) If multiple lines are configured on your phone, select the line to forrad from the list using 3. Using , select the forwarding type you want to modify and so printing the Select soft key. -
Page 41: Using Voicemail
Using Voicemail Each telephone receives a Voicemail box which can tape up to 90 minutes of messaging with a maximum of 5 minutes per bulletin. Each user can record his or her personal greeting for the voicemail box. Voicemail is automatically saved for 90 days. Letters tin can be retrieved from the Desk Phone, any other phone or through a personal website at https://cp.serverdata.internet. -
Page 42: Retrieving Messages When You Are Away From The Office
Retrieving messages when you are away from the office 1. Dial your Desk Phone and allow it to ring 2. 2. When your voicemail greeting begins to play, enter your Pivot over your greeting. Returning a Phone call 1. While listening to a message or later listening to a message, press 9* to phone call that person back 2. -
Folio 43: Retrieving Messages Via The Web
3. Click Login Retrieving messages via the Web 1. In one case logged in, click the Play push associated with the voicemail bulletin you wish to listen to 2. The voicemail bulletin will play through your speakers Forrard Voicemail Messages via the Web A user can forward a voicemail message from his or her voicemail box to another voicemail once logged into the personal website. -
Page 44: Additional Phone call Features
individually. Voicemail groups are created through your personal website. ane. One time logged in, select the Personal Info Tab 2. Select the Grouping Managing director button 3. Click the Create Group button iv. Assign a Group Number- used when forwarding to a group through the phone five. -
Folio 45: Redial
Redial The Redial function places a call to the final number dialed. To utilize the Redial office: ane. With the handset on the hook, press the Redial soft key Mute The mute feature allows you to hear the other party, merely they cannot hear you. -
Folio 46: Managing Contacts
Press to select the entry. . Use to coil through the listing to find the contact. four. Press the Edit soft key. 5. Press repeatedly until the speed dial index appears. 6. Press to select the speed dial index for edit. vii. - Page 47 When adding the first contact, y'all do not need to press the Up pointer key. Note Press to add a new entry. Printing to enter a beginning proper noun. Entry to this field is alphabetic every bit denoted by 6. Enter the starting time name of the contact from the dial pad. seven.
-
Page 48: To Add A Contact To The Local Contact Directory From A Call List
For more than data on diverting contacts, refer to Diverting Calls on page Diverting Calls. 13. Repeat steps iv to eight to change the Machine Refuse, Auto Divert, , o r to switch betwixt Enabled and Disabled settings. For more information on setting the Machine Reject field, refer to Rejecting Calls on page Rejecting Calls. -
Page 49: To Edit A Contact In The Local Contact Directory
vii. Press repeatedly to render to the idle display. five. Press the Relieve soft primal to save the contact in the local contact directory. "Entry saved" appears on the graphic display. But the first proper noun, last name, and telephone number are saved. If the contact already exists in the contact directory, "Entry already exists"... -
Folio 50: To Search For A Particular Contact In The Local Contact Directory
to select the entry. iv. Press five. Press the Delete soft key. The contact is deleted from the directory. The next entry in the directory appears. 6. Press repeatedly to render to the idle display. Placing a Phone call to a Contact Placing Calls From the Contact Directory To identify a call to a contact in the local contact directory: ane. -
Page 51: Inbound Caller Id
label volition exist retrieved. The second central press repeats the process using the 2d letter on the key and then on. For case, to find the beginning directory entry whose last name starts with J, press the v key once. To find the outset entry whose concluding name starts with R, press the 7 primal 3 times. -
Page 52: Telephone call Recording
Choice upwards your HPBX phone Dial *97. Press the Dial soft central to speed upwardly the procedure The phone will answer the call in its pickup group that has been ringing the longest Call Recording The Call Recording feature allows you to record calls whenever you wish via the *eighty command. -
Page 53: Extension Ready-Up Options
Extension Set-Up options Forward Incoming Calls Your Desk Phone supports three types of call forwarding: Forward all calls - Forwards all calls to the telephone number of extension of your choice. Forward when decorated - Forwards all calls to voicemail when your phone is busy and cannot be changed. -
Page 54: Do Not Disturb
Appearance of Time and Date The fourth dimension and date appears on the graphic display of the Polycom ii-Line Desk Phone. You lot take command over the format of the time and date display and can plough the brandish of time and date off. The default time and... -
Page 55: To Configure The Time And Date
To configure the time and date: 1. Press Menu. Select Settings > Bones > Preferences > Fourth dimension & Date. 3. Select from Clock Date, Clock Fourth dimension, Clock Order, or Enable/Disable. 4. Roll through the options nether each of these selections using 5. -
Page 56: Headset Memory Way
This feature enables electronic hookswitch back up. For data on supported headsets to provide electronic hookswitch features for placing, answering, and ending calls, get to www. polycom.com/support/voice and enter "Headset Compatibility Listing" in the Cognition Base text box or contact your system... -
Page 57: To Select A Headset That Supports Electronic Hookswitch
To select a headset that supports electronic hookswitch: 1. Printing Menu. Select Settings > Bones > Preferences > Headset > Analog Headset Fashion. iii. Apply the up or downward to select your headset and press the Select soft central. 4. Press or the Go out soft key repeatedly to return to the idle. -
Folio 58: Linguistic communication Support
Language Support Many languages are supported past the SoundPoint IP 32x/33x SIP phone. To alter the linguistic communication: Press . Select Settings > Basic > Preferences > Language. Scroll through the list of bachelor languages Press to confirm your choice. Text that appears on the graphic display will change to the language of your pick. -
Page 59: Muting The Microphone
Press Check key to select your choice. Press the Aye or Cancel soft keys to accept or cancel changes. Depending on the size of your local contact directory, the reconfiguration may take a few minutes. Note The phone volition restart to set the new directory search mode if you pressed the Aye soft primal. -
Page 60: Ambassador Functions
Administrator Functions The Administrator has the ability to make configuration changes to phones and other pieces of equipment. All changes for this phone are made through the Control Console. Making Changes through the Web-based Control Console The Command Panel allows you to manage virtually all aspects of your phone system and phone service. -
Page 61: Viewing A Listing Of Your Telephone Numbers And Extensions
Viewing a List of your Telephone Numbers and Extensions To view a list of all phone numbers and extensions, click the Numbers & Extensions tab within the Command Console. You will be presented with a sortable tabular array displaying all phone numbers, extensions, equipment and services. -
Page 62: Irresolute The Extension Number Of A Phone
giving the 911 dispatcher your address, the 911 dispatcher volition send assist to Note the address shown on the screen. Irresolute the Extension Number of a Telephone Each telephone automatically receives an extension number. You may change the extension number of any telephone or swap the extension numbers of two phones. -
Page 63: Irresolute The Failover Routing Of A Telephone
• The phone number assigned to the phone • Whatever other telephone number assigned to your company • Block Outbound Caller ID from the phone 2. Click the Relieve button Note: Changes to the Outbound Caller ID may have upward ten minutes to procedure.
Source: https://www.manualslib.com/manual/988704/Polycom-Ip331.html
0 Response to "How To Change Extension Name On Polycom Phone"
Post a Comment